
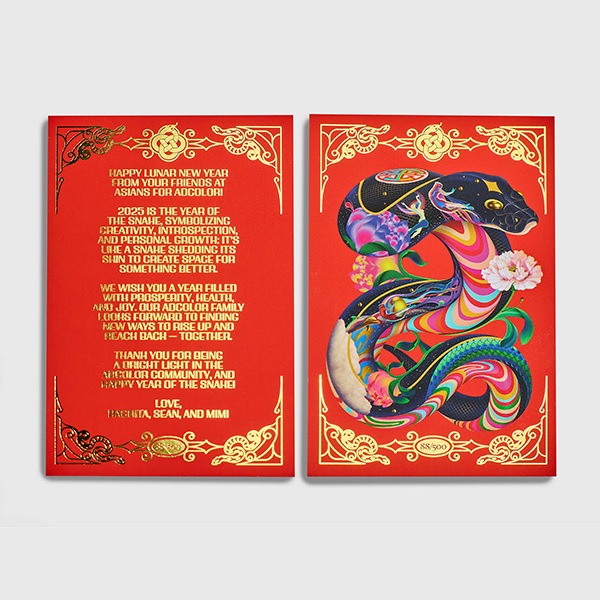
Print Design Needs Bleed
Files without proper bleed is a common problem we see when preparing art for print. Bleed is the part of the art that extends beyond the trim edge of the final printed piece. Since there ares slight variations in the printing and trimming processes, if the artwork ends right at the trimmed edge it’s too easy to be off by a hair on the cutter and leave a glowing sliver of white paper visible. To keep this from happening it is important that your art extends beyond the location of the trimmed edge.
Ask your printer how much bleed is appropriate for a specific job. For offset jobs an eighth of an inch is necessary; for wide-format jobs on big inkjets as much as half an inch of bleed might be required. While most graphic designers include bleed when they are working on a job, if the settings aren’t correct, that bleed can disappear before the job leaves your studio.
Fortunately, design tools have ways to help us get it right.
Adobe Illustrator
To set up a new document in Illustrator, make the artboard the trim size and set the bleed to 0.125 inch or more on all sides. Then when you Show Guides, a red bleed-box becomes visible and you should extend the art at least to that line.
When you save your working .AI file as a PDF-compatible .AI File, or save it as a PDF, it will include the necessary bleed only if you have set the bleed in Document Setup. If the bleed is set to zero, the art will be clipped at the edge of the artboard and your printer will either have to repair it or will ask you to re-send it with bleed.
Adobe InDesign
In the New Document dialog box set the Bleed to a minimum of 0.125 inch on all sides. With guides turned on you’ll have a nice bleed-box showing how far beyond the trim edge to extend the art. Later, if you export the job as a PDF/X-4 for your printer, when you select “Include Crop Marks” and “Use Document Bleed Settings”, the PDF will include the necessary bleed.
How To Build Facing Pages
A facing pages job presents a tricky case when building bleed into InDesign files. In a perfect-bound or wire-O book, the art has to bleed off all sides of each page including the spine side (this does not apply to saddle-stitched jobs). It’s a common problem with a simple solution that I found to be completely counterintuitive.
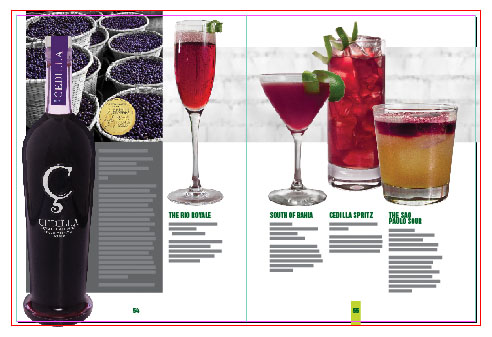
This example shows that you don’t always need to separate the pages in a spread. The art runs right across the gutter so those pages should stay together.
On the other hand, this spread must be split. If it were to remain together, any imperfection in trimming the photo page would leave a strip of bright yellow-green along its spine side edge.

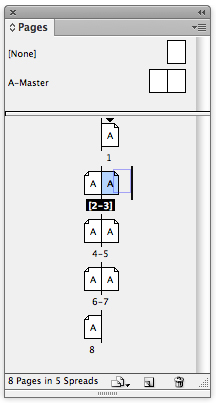
To separate the left and right-hand pages of a spread:
In the fly-out menu of the Pages panel, uncheck Allow Document Pages to Shuffle.
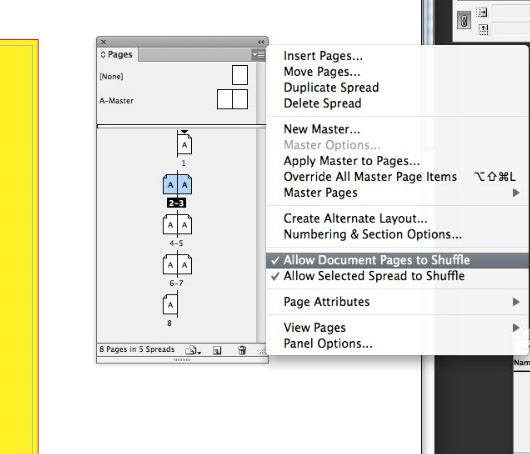
Split the spread by dragging one of the page thumbnails away from the spread until you see the vertical bar, then release the page.
Now go back and extend your art into the bleed on the spine sides. The bleed will work properly, but you cant end up with a little bit of the facing page visible where you dont want it.

Contact us if you have questions or would like help in setting up your file.
Related Blogs
How a Custom Online Company Store Streamlines Brand Management
What Is Sleeking? A Guide to Digital Foil
The New Premier Press Website: Your End-to-End Brand Partner

How Premium Packaging Design Transforms the Customer Experience


